- Create a Conda Environment
Before you start, you will need to create a conda environment. If you already have a conda environment set up, you can skip to the next step. You can load the Miniconda module with ‘module load miniconda3/miniconda’. Then, create a conda environment with ‘conda create -n env_name python=3.9’. When prompted to continue, hit ‘y’.
:~$ conda create -n env_name python=3.9
Channels:
 - conda-forge
 - defaults
Platform: linux-64
Collecting package metadata (repodata.json): done
Solving environment: done

## Package Plan ##
 environment location: /data/ /.conda/envs/env_name
 added / updated specs:
 - python=3.9
This will create a conda environment called ‘env_name’ using Python version 3.9, though you can use any version. Finally, activate the environment with ‘conda activate env_name’.
Proceed ([y]/n)? y

Downloading and Extracting Packages:

Preparing transaction: done
Verifying transaction: done
Executing transaction: done
#
# To activate this environment, use
#
# $ conda activate env_name
#
# To deactivate an active environment, use
#
# $ conda deactivate
:~$ conda activate env_name
(env_name) :~$
- Install and run Jupyter
Now, install jupyter to your conda environment with ‘conda install jupyter’. You will be prompted to continue; hit ‘y’, and conda will proceed. Once installed, run jupyter notebook --no-browser --ip=$(hostname -i)In most cases, this should be done on a compute node, i.e. by executing it in a Slurm batch script. For example, you may use the following batch script:
$ jupyter_test.sl
#!/bin/bash
#SBATCH --job-name=jupyter_test
#SBATCH --output=slurm_%x_%j.out
#SBATCH --time=0-00:10:00
#SBATCH --ntasks=1 --cpus-per-task=1 --mem-per-cpu=500mb
# Load the miniconda module and activate the environment with Jupyter
module load miniconda3/miniconda
conda activate env_name
# Navigate to the directory containing the .ipynb file you want to run
cd (path to working directory)
# Start the notebook
jupyter notebook --no-browser --ip=$(hostname -i)
Submit this job ‘sbatch jupyter_test.sl’. This will start a Jupyter notebook session on a shared node. Once the Jupyter server is activated, check which node the job is running on with ‘squeue -u <YOUR_USER_ID>’. This will output something like
:~$ sbatch jupyter_test.sl
Submitted batch job 2249324
:~$ squeue -u johnchris
JOBID PARTITION NAME USER ST TIME NODES NODELIST(REASON)
2249324 shared jupyter_test johnchris R 1:13 1 c110
:~$
Here, the notebook is executing on node c110. Save this for later. You will also need to inspect the output file; this job has id 2249324, so you read the file with ‘cat slurm_jupyter_test_2249324.out’:
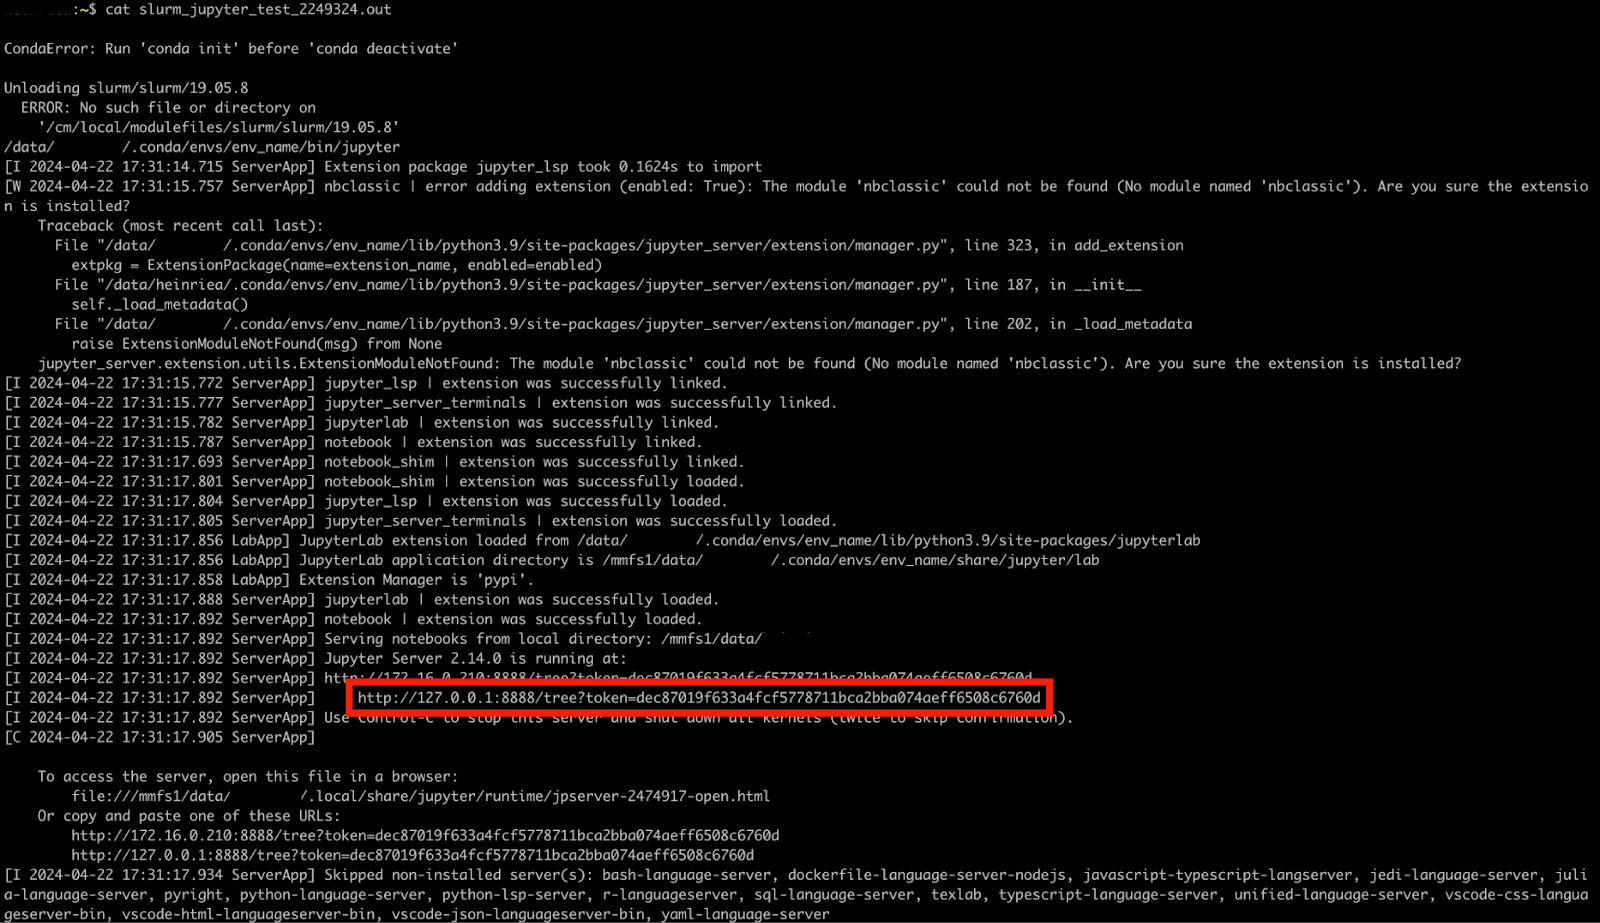
Note the section in the red box. It reads ‘http://127.0.0.1:8888/tree?token=(some stuff)’. The ‘8888’ is the port number which the Jupyter server is listening on. You will now need to forward an ssh connection from your local machine to the Compute node. From your home computer, type
ssh -L 8888:<YOUR_NODE>:<PORT_NUMBER> <YOUR_USER_ID>@andromeda.bc.edu where, in this case, the port number is 8888 and the node is c110.
This will start an ssh session on Andromeda; leave the following session open.
MT8ON8ONEI:johnchris.$ ssh -L 8888:c110:8888 johnchris@andromeda.bc.edu
johnchris@andromeda.bc.edu's password:

Last login: Tue Apr 23 11:11:48 2024 from 10.32.69.54
Welcome to BC's HPC cluster, Andromeda!

This login node is for cluster access only.

Please use the "interactive" command if you need to run
a script, build a package or open software like Matlab,
Stata, Rstudio, etc… (Usage: interactive -h)

Please visit the SchedMD website for more Slurm info:
https://slurm.schedmd.com/quickstart.html

*Slurm job emails can only be delivered to @bc.edu addresses.

NoMachine connections:
Idle/Disconnected sessions will be killed after 24 hours
Limit of one desktop session per user

-RS
researchservices@bc.edu
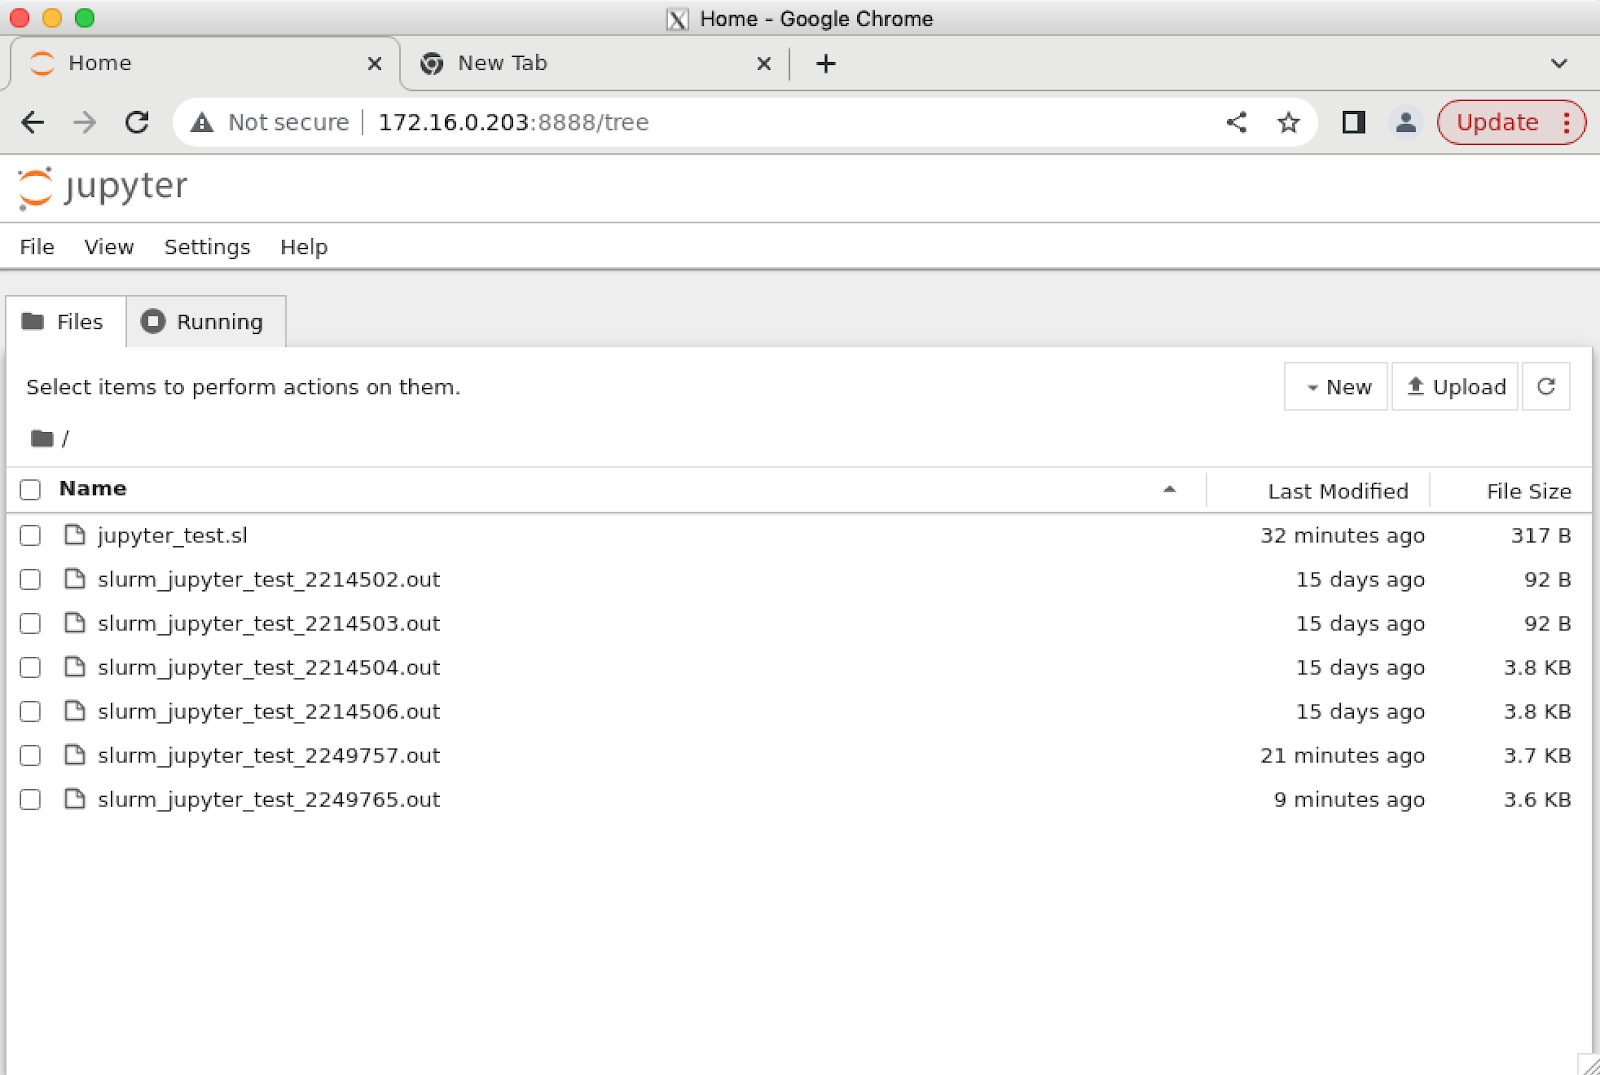
On your local computer, open Google Chrome or Safari and paste the token into the browser. This should open your remote Jupyter session and you should be able to run and modify the code shown below