Cyberduck, FileZilla, Rsync, SCP
One of the most common questions is how to transfer files to or from an HPC cluster. Users can use one of the following graphics transfer tools and command line tools.
Graphical Transfer Tools: Cyberduck and FileZilla
Cyberduck and FileZilla provide convenient graphical interfaces for transferring files between systems. On Andromeda, FileZilla is available as a module and is commonly used within interactive sessions for transfers between servers. Cyberduck, which need to be installed locally on your computer, can be used for transferring files between your local machine and the cluster. FileZilla can also be installed locally and used for transfers between your computer and other systems, including university servers managed by other institutes and cloud hosts.
Note: Andromeda’s Open OnDemand web interface includes built-in file management and transfer capabilities that can perform many of the same tasks as Cyberduck for moving files between your local computer and Andromeda. For many users, Open OnDemand provides a simple browser-based alternative that does not require installing a separate transfer application.
Cyberduck – From Local Computer to University Cluster
- Download Cyberduck. If you are not on campus, you will need to install and login to EagleVPN before opening a connection.
- Start Cyberduck, click Open Connection on the top left corner.
- Select SFTP (SSH File Transfer Protocol), fill in the Server andromeda.bc.edu, and leave the Port as 22. Enter your BC username and password, then click Connect.
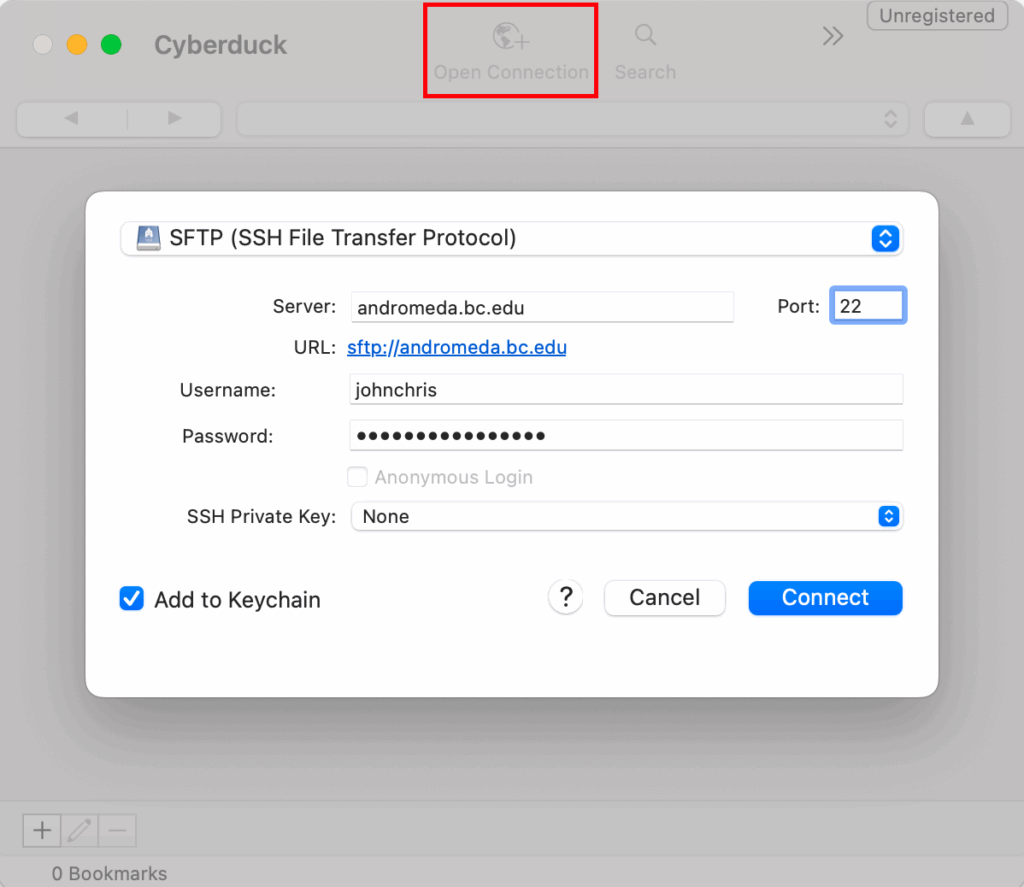
- If you are asked to allow an unknown fingerprint, click Allow and check the box Always.
- Now you are connected and you can see all your files in the cluster.
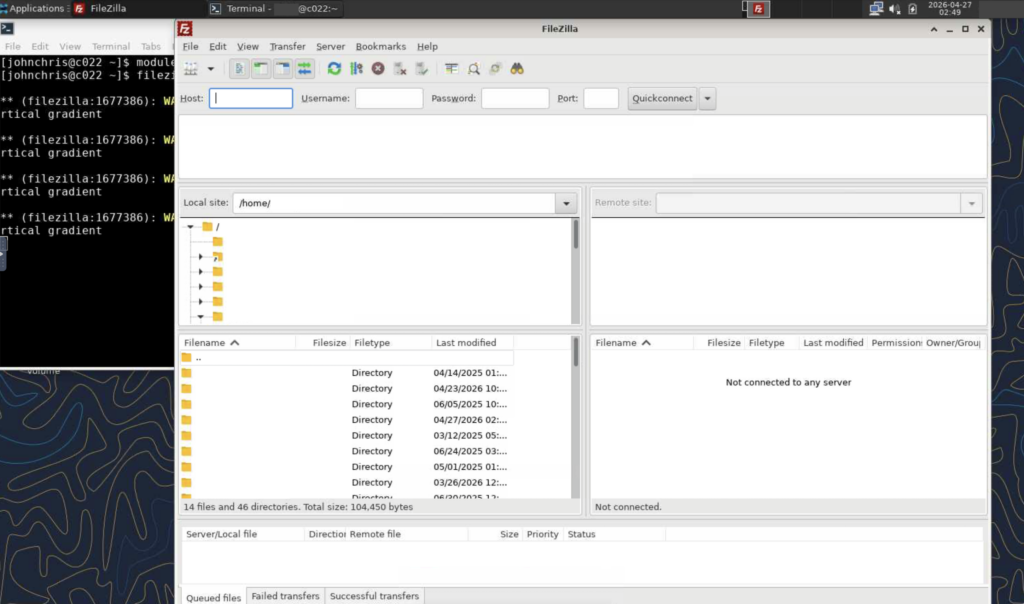
FileZilla – Between Servers
FileZilla has been installed cluster-wide and its graphical user interface can be easily accessed through remote desktop sessions on Open OnDemand.
Launch a remote desktop session after log in OOD, open a terminal window in it, and type the following:
module load filezilla
filezilla
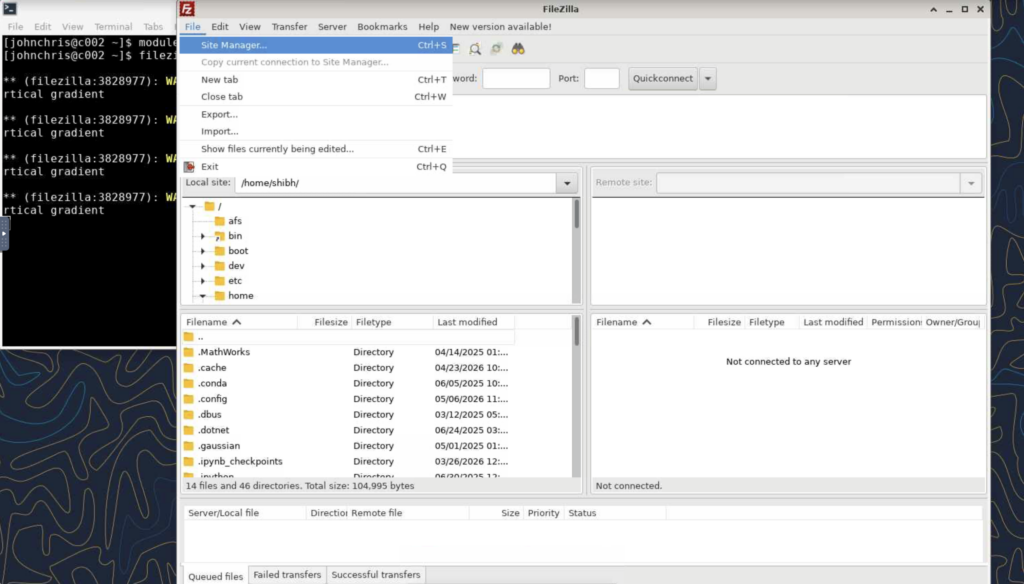
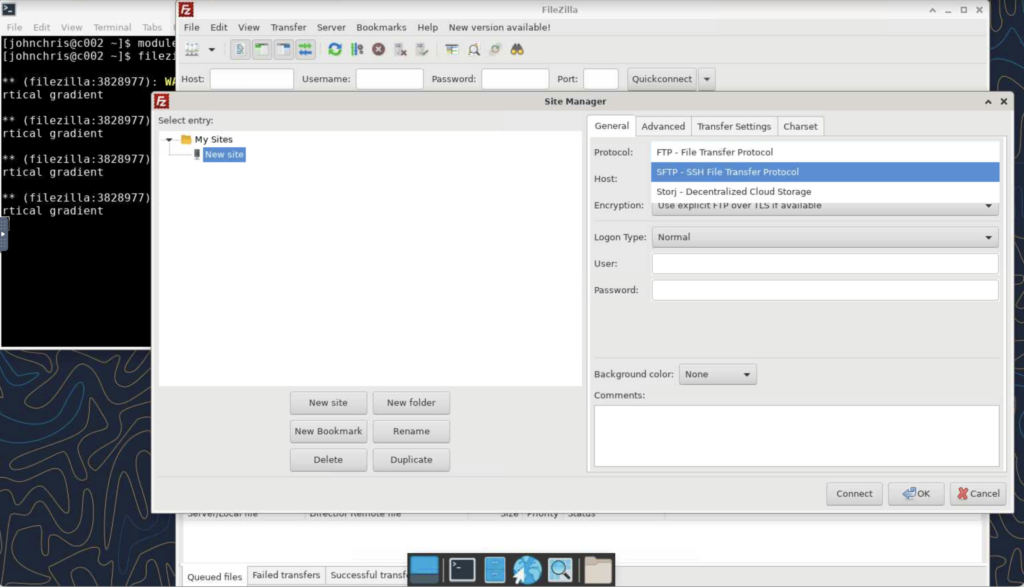
To add another cluster, choose Site Manager option from the File menu.
Click New site:
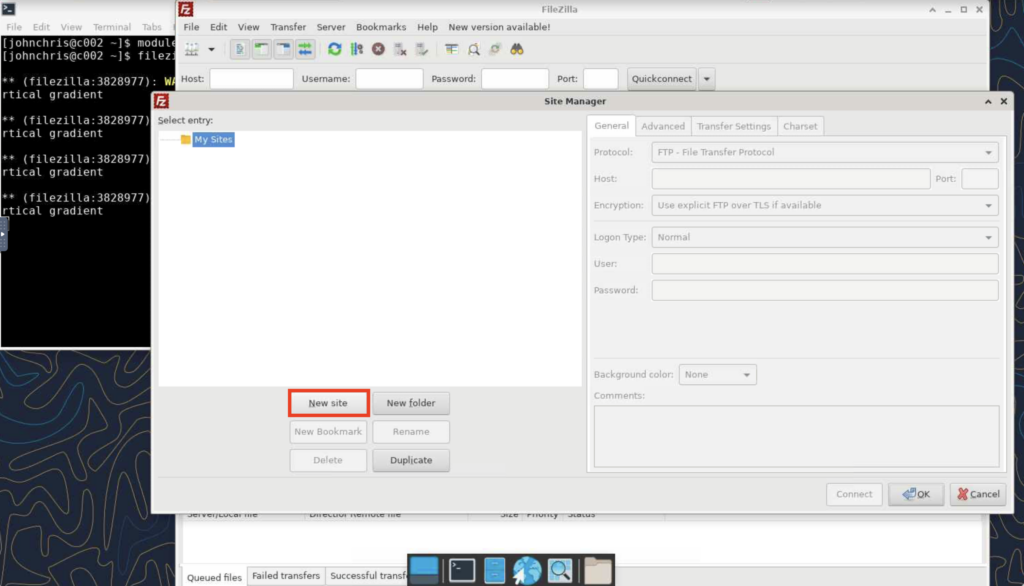
Choose the protocol (typically SFTP for secure connection), type the host address, username and password for your account on the other cluster, as well as the corresponding port number (usually 22 for SSH connections), and then click Connect.
Command Line Tools: Rsync and scp
Rsync – A Fast, Versatile, Remote (and Local) File-copying Tool
Rsync is well-known for its transfer algorithm, which reduces the amount of data sent over the network by only sending the missing files between the source and the existing files in the destination. It is frequently applied for remote transfers between two systems and is also great for local work.
The basic syntax of the Rsync command is:
rsync [source] [destination]
Here, “source” and “destination” are the paths of the files or directories being copied.
Using Rsync for local work
Copy “myfile” to “myfile-copy” with progress meter:
rsync –progress myfile myfile-copy
Copy “mydir” to “mydir-copy”
rsync -avP mydir/ mydir-copy/
Here, -a indicates archive mode, which preserves ownership, permissions, and creation/modification times. The -v option enables verbose mode, printing the name of every file, and -P displays a progress bar.
Using Rsync to Sync with a remote system
Upload my directory or my file from the local machine to the user johnchris home directory on the andromeda cluster
For example:
rsync -avxz mydir/ johnchris@andromeda.bc.edu:~/projects/johnchris
Download my directory or file from user johnchris home directory on the andromeda cluster to the local machine
For example:
rsync -avz johnchris@andromeda.bc.edu:~/projects/johnchris .
SCP – Secure Copy (Remote File Copy Program)
We recommend using SCP to copy data to and from the BC cluster Andromeda. It’s a fast and simple application for securely copying data in a one-time transfer.
The general syntax of the SCP command is:
scp [options] [source] [destination]
Here, “options” can include things like the username and hostname of the source or destination, and “source” and “destination” specify the paths of the files or directories being copied.
Example: Transfer File or a Folder from Your Local Computer to the BC Cluster
scp [location of file] [johnchris@server:][destination of file]
A cluster user with the login id johnchris would like to transfer a ‘ mydata.txt ‘ file from their personal laptop to the ‘/scratch/johnchris’ directory on the andromeda cluster.
scp mydata.txt johnchris@andromeda.bc.edu:/scratch/johnchris
Add -r option, if Transferring a whole folder named ‘mydir’
scp -r mydir johnchris@andromeda.bc.edu:/scratch/johnchris
Example: Transfer a File or a folder from the BC Cluster to Your Local Computer
scp johnchris@andromeda.bc.edu:/projects/johnchris/ mydata.txt .
To transfer the ‘mydirectory’ directory and all of its contents with the ‘r’ (recursive) option
scp -r johnchris@andromeda.bc.edu:/projects/johnchris/mydata.txt .
“.” represents your current working directory.
To specify the destination, simply replace the “.” with the full path:
scp -r johnchris@andromeda.bc.edu:/projects/johnchris/ mydata.txt . /path/mydir